Category Archives: Educate

Easter Garden {cultivate}

Standard

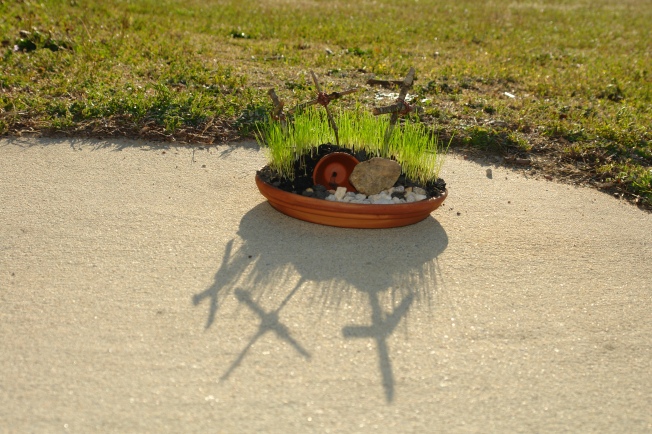
During last week’s homeschool art class at our church, the group did the cutest project for Easter. I had actually seen it surf by in Pinterest but had forgotten to pin it, so I was pretty excited when I arrived in class and discovered what the day’s craft would be! Most of the materials are things you’d find in your own back yard, so it’s even low cost!

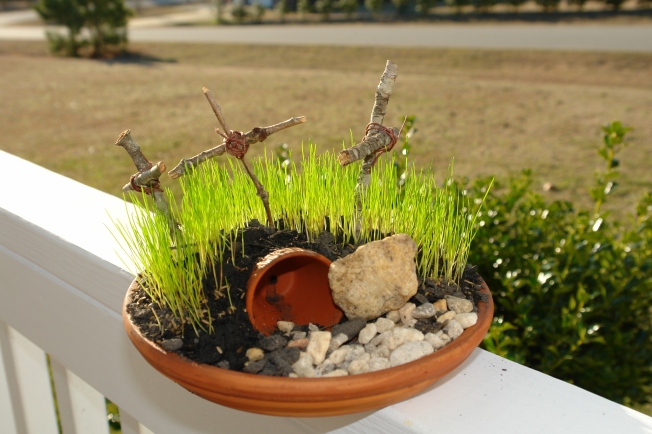
You’ll need: a large terra cotta saucer (ours were 8 inch, I think), a small terra cotta pot, soil, grass seed, twigs, twine (and/or hot glue gun), small pebbles and one larger rock. I was baby-sitting a toddler for someone while the class was going on, so I didn’t actually get to see the process of putting it together (they did it outside), but it seems pretty simple enough. This site, A Homestead Heart, gives a great tutorial. I did help with the crosses on TG’s, and what we did was hot glue the two sticks together so they held and then we criss-cross-tied the twine over the twigs to help them stay put.

Easter Garden after 1 week.

Easter Garden after 1 week.

The site I linked to said it would take about 7-10 days for the grass seed to germinate and sprout, but ours took less than a week. The above picture was taken on Thursday, one week after they planted them, and look how high and filled in it is already! My kids have been thrilled to check it every day, water it and watch how high the grass is. It’s sitting on our kitchen table (to get some nice sunshine) and whenever I would check, I would see the big rock covering the “tomb” and would place it back to the side. I discovered the other day that my daughter TG kept putting the rock in front “because it’s not Easter yet!” And that, of course, is when the stone was rolled back and Jesus arose from the dead. Oh, how literal little ones can be! 🙂

I love the great reminder this craft gives that Jesus is risen! Every day we can look at our Easter garden and be reminded of that. And the science/gardening lessons they learned are pretty cool, too. 🙂 You’ve still got time to make one with your own family before this Easter holiday–sounds like a great weekend project to me!

In the shadow of the Cross

In the shadow of the Cross

Happy Birthday, Dr. Seuss! {cultivate}

Standard

This week, I’ve noticed a lot of parents posting pictures of their kids in wacky hats, dressed up as their favorite book characters and other lots of book-related fun. And then I find out there’s a celebration of Dr. Seuss this week! Sounds like a fun day of school to me! I didn’t have a lot of time to prepare, but we managed to have a Seuss-tastic day of it anyway.

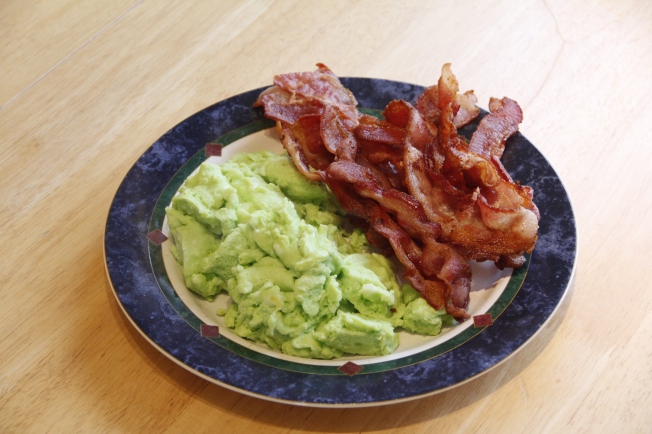
We started our day with some green eggs and ham (well, a version of ham). Thanks to the Daddy of the house, who works from home on Fridays and got to join in the fun. In person, our eggs were a nice, bright spring green. A little more palatable. Our daughter was hesitant, but our 4-year-old little man dove right in. But everyone ate them!

Green eggs and...bacon. It's all we had.

Green eggs and…bacon. It’s all we had.

We did some of our regular math worksheets and I added in a couple of Dr. Seuss-related ones. Seussville.com has a large selection of printables and activities that I snagged one from, and I look forward to using more of their resources for next year’s Suess Day or even if I want to focus on a particular book sometime. My daughter and I read The Cat in the Hat together for reading time, and then, since I had wanted to read Green Eggs and Ham, but every copy was checked out in our library system (including the audio books!), I let Tim Tebow read it to my kids instead. I also had a Dr. Seuss children’s biography book on reserve from the library, but it hasn’t become available yet. I was disappointed in that, but we’ll just have to read it next week when it comes in. The name of it is The Boy on Fairfield Street: How Ted Geisel Grew Up to Become Dr. Seuss.

We had a bit of musical appreciation while we did our craft. We stumbled upon some of the soundtrack to Seussical the Musical on YouTube, and the kids had fun dancing around, especially to the Green Eggs and Ham song. I admit that I do not know anything about Seussical, but the songs we listened to were pretty upbeat and fun. I might investigate it further, because I love musicals.

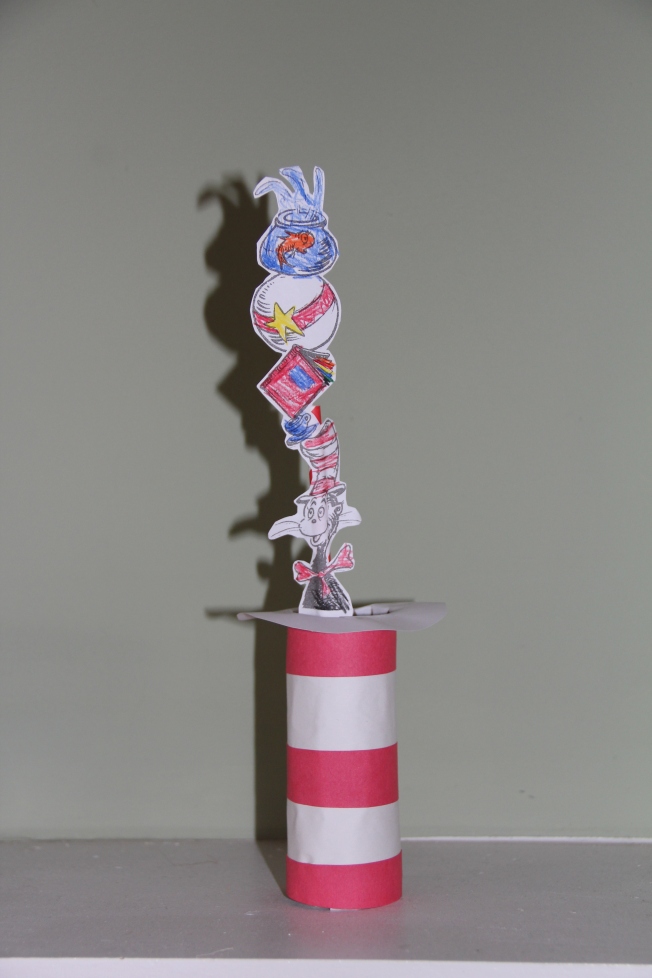
For our craft, we made Cat in the Hat pop-up puppets that I found here at Stuff by Ash. A bit more parent helping required than I usually like for a children’s craft (gluing on the top and brim of the hat, and cutting out of things), but I think our girl liked the project in the end. You can’t see it in the picture, but instead of a dowel rod, I reused a red-and-write striped straw from our Valentine’s Jar of Hearts project. How’s that for great repurposing!)

Cat in the Hat pops up!

Cat in the Hat pops up!

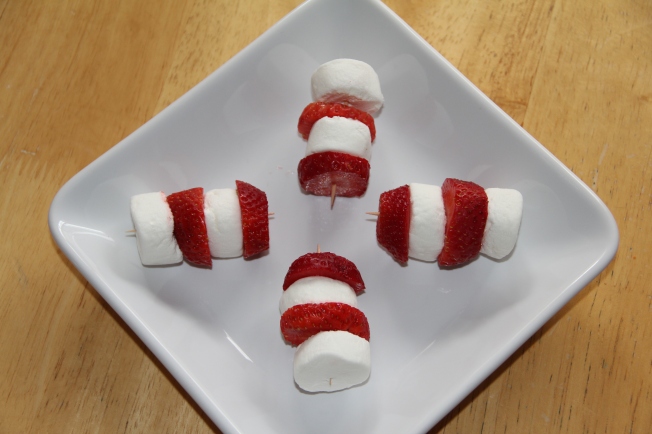
After all that learning and dancing and fun, everyone was hungry, so along with our peanut butter and jelly sandwiches, I made Cat in the Hat Hat Kabobs. I saw the idea on Pinterest to make them with strawberries and bananas, but I lacked the bananas and had to improvise. They were a hit!

Cat in the Hat Hat Kabobs, with strawberries and marshmallows

Cat in the Hat Hat Kabobs, with strawberries and marshmallows

Fridays are our usual pizza-and-family-movie night, so I think we’re going to conclude our Seuss Day with a Netflix viewing of The Lorax. It’ll be a new one for all of us; I’ve never even read the original story, or not that I remember anyway. I’ve seen so many adorable and creative ideas for Dr. Seuss-themed crafts, food and learning that I look forward to doing this day again next year–or maybe even sooner, when I have the chance to better prepare for it!

What’s your favorite Dr. Seuss story?

Homeschool Organization: The Well Planned Day Planner {cultivate}

Standard

I promise, one of these days, to get around to talking about the homeschool part of this home :-). For now, I’ll just mention one thing that has helped me keep track of this year: the Well Planned Day homeschool planner.

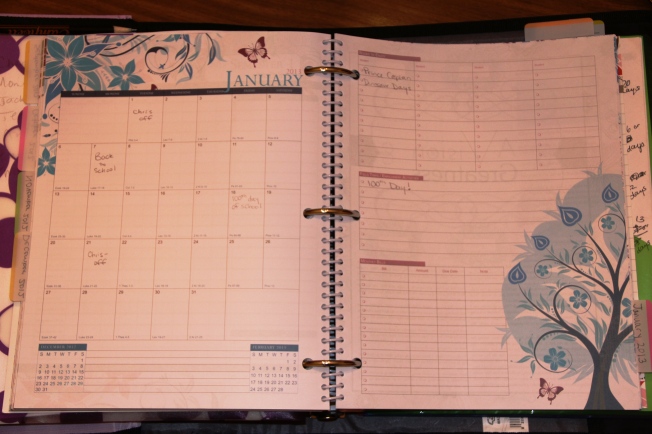
Last summer, I went back and forth between the Well Planned Day book and Apologia’s Ultimate Homeschool Planner. They both looked like they had a lot of the features I was looking for and I had a hard time figuring out which one I would prefer using. I also spent a lot of time perusing Pinterest for the homemade printable versions that many other homeschool moms have created. I had briefly flipped through Apologia’s book at the spring homeschool convention, but everything that weekend was such a blur, I didn’t really remember much about it by the time I wanted to order one. Finally, since we had already started our school year and I was starting to feel overwhelmed, I bought the Well Planned Day. I liked the fact that it had all the year’s calendar dates filled in, and the month-at-a-glance/weekly schedules for each month in one place, and as a newbie, I wanted something to make my life easier.

Well Planned Day homeschool planner

Month-at-a-Glance from the Well Planned Day homeschool planner

I liked the semester attendance page, because I wondered how I was supposed to track attendance. It even had places for “sick days” which I didn’t think existed in homeschool ;-). There are also progress reports/report cards, which I haven’t used since we’ve only got kindergarten here. There are places to plan the school year for up to four students in the planner. Each week also has a (small) space for menu planning, which I have appreciated. It’s easy to jot down meal ideas for the week and I do believe it has helped us to eat more at home instead of me coming to the end of the day and wondering “Hmm, what on earth should I do for dinner?” Other features, some of which I’ve used, some of which I’ve not, include:

  • perforated, tear-out shopping lists
  • holiday planner
  • monthly budget
  • books to read list
  • field trip section
  • Bible verses
  • monthly encouragement devotional.

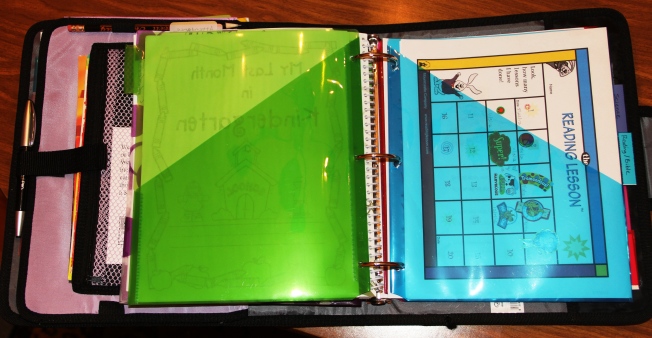
In addition to the planner, I bought a large three-ring fabric-covered binder that is basically my school brain. I looked in both Target and Wal-Mart, and I think the one I bought ended up from Wal-Mart; it was around $12, which I thought was reasonable (and cheaper than the matching binder that you can buy with the Well Planned Day planner). I added my spiral bound planner, and several colored dividers with pockets. My original plan was to print out everything for the month or week ahead and have them placed in the appropriate dividers. Ha! Maybe I will be able to do that for *next* year. It’s been great to keep track of the mess of papers which seems to accumulate daily, however.

3-ring binder with dividers/folders

3-ring binder with dividers/folders

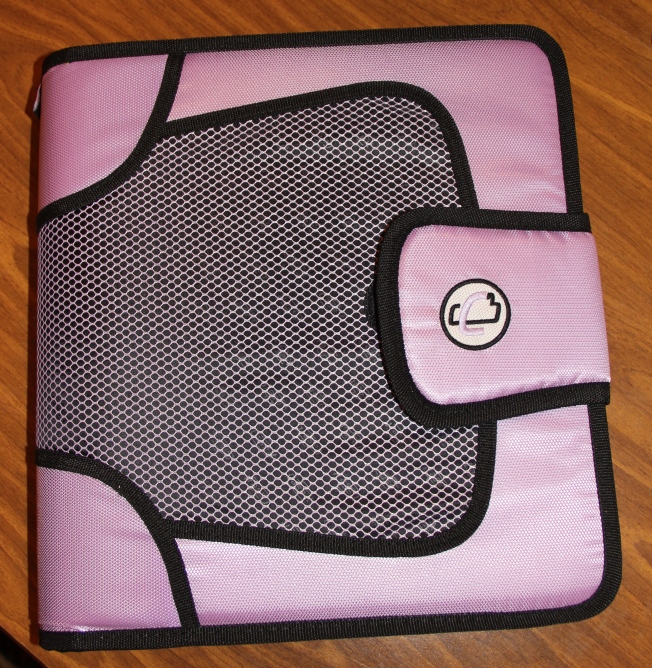
Seriously, this binder and planner combo have been a fantastic tool for me as I’m still wading these unfamiliar homeschool waters. I’m probably not using the planner to its greatest potential, and I’m not sure what I’ll end up using for next year, but it’s helping me figure out what works for me, and what doesn’t. Oh, and I checked for my binder brand, and it’s called Case-It. This one seems to be it, although it’s a different color. (And yes, mine also has the pull out file folder, but I worried that it wouldn’t be big enough for the papers I would use, and I wanted it to be easy to flip and get to rather than having to unlatch the velcro closure to the file folder all the time.)

Case-It 3-ring fabric binder

Case-It 3-ring fabric binder

Oh, and in case I’m supposed to mention it, none of these companies have sent me anything or are asking for reviews. I am just sharing what has worked so far in our homeschool journey.

Do you use one of these homeschool planners? Do you make your own? I would love to hear your ideas for how you keep track of your homeschool day!

“You’re a Star” Reusable Workbook {cultivate}

Standard

I finally sat down yesterday and set our overall schedule for our homeschool year: what weeks our school will be in session and which days will be off for holidays and the like. We’ll be running from August to mid-May, but if something happens during the year (i.e., ill health, unexpected trips, we just need a short break), there are still a couple weeks of May left to be what I’m calling flex time. I’d like to be done as early as possible before the unbearable heat kicks in here, which is why I wanted to finish in May rather than June. But it’s nice to have that little bit of cushion for the unexpected. I have no idea if I’m doing this homeschool thing right, but it sounds good to me! At least, right now it does.

After I finished with the schedule, I decided to tackle something that’s been on my “To Do for School” project list for awhile. I already had my materials and I just needed to sit down and do it. So last night, I did. Have you seen any of these on Pinterest or in your web browsing?

Top row: iCandy Handmade, My Three Bittles

Bottom row: The Creative Homemaker, I Am Momma, Hear Me Roar

I am sure there are dozens more out there, but those are just a few samples that caught my eye. I’ve seen them called quiet books, fun folders, homework folders…all sorts of things. I tried to come up with a cutesy name for mine last night with no luck, so for now I’m calling it the reusable workbook. I wanted something my daughter could work through independently without having to print out tons of printables all the time or buying workbook after workbook. When I saw these ideas, I knew I’d found my answer.

First, gather your materials. You’ll need a binder (I chose the 1-inch one), clear sheet protectors (I think I started out with the 25 pack, but I’m sure I’ll get more), decorative papers/stickers, adhesive (depends on how you’re decorating the covers) and worksheets. For the worksheets, I just searched various sites and printed out a bunch of ABC writing pages, number pages, mazes, connect-the-dots, things of that nature. If you don’t have or want to use a printer, you can buy a couple of inexpensive workbooks from Wal-Mart or the Dollar Store, tear out the pages and place them in the binder. I might do that just to mix things up a bit and add some color into the book.

binder, clear sheet covers, paper and stickers…ready to go!

Next, I started laying out my decorative papers in various ways, trying to figure out how I wanted the cover to look. While I loved the look of the one above with the child’s name, for now I wanted my book to be used by either my son or daughter, so I wanted the colors to appeal to both. This part took the longest for me, because I’m so indecisive. 🙂 Then I used my scrapbooking tools to cut out the papers, sprayed on some spray adhesive and went to town. The other part that took me forever was trying to figure out what title to put on in place of a name. Like I said, I wanted a cutesy name for the book. Finally I decided to cut my losses and just go with “You are a STAR!” I’m digging it. 🙂
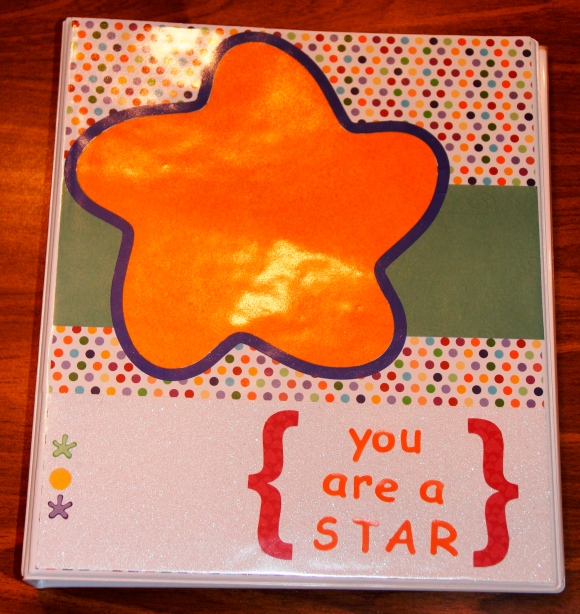
The binder’s front cover (sorry for the glare; that’s what happens when you work late at night and need to take pictures) 🙂

View of the back cover and spine with the front

While my spray adhesive was drying (those are the final pictures above; I waited about an hour for the adhesive to fully dry before I placed the paper in the binder covers), I searched and printed out some pages for the inside. There are so many places online and they’re just an easy Google search away, but some of the ones I used were Making Learning Fun, 1+1+1=1 and Kindergarten Worksheets. I slipped two pages, back-to-back, in each clear pocket to maximize space. I haven’t finished the inside yet, as it was pretty late and I was tired, but I’ve got plenty of room to add on.

Inside pages include mazes and color-by-number 

inside pages include math/number and letter worksheets

And that’s it! Just add dry erase markers or dry erase crayons, and your child is ready to go! I showed the binder to my daughter this morning, and she loved it. She’s one of those kids who does like to just sit and do worksheets, so I knew this would go over pretty well with her. I’ll be interested to see whether my 3-year-old will find any interest in it.

I’m starting to feel some momentum with my planning and preparation for homeschooling (good thing, right, since we’re starting *next month!*). Next on my agenda is to plan potential field trips and special unit studies for the year. I haven’t decided if that’s something I want to do every week or not yet. I don’t want to overwhelm either my daughter or myself. But I seem to be really drawn to the concept of unit studies, even though the curriculum we bought didn’t really include them. I guess it’s another thing we’ll have to wait and see how it goes when the time is here.
{Cultivate}

Standard
source: sxc.hu

Cultivating growth takes time

I was trying to come up with a descriptive word to put on all my posts about homeschool and education. At first, I was planning to use {on our slate} as a cutesy nod to the (way) Old School use of chalk and slates to write math problems and spelling words and whatever else Anne of Green Gables or whomever needed to use them for. I still like the phrase, but then a synonym for educate– “cultivate”–caught my eye. And underneath that entry read:

Definition: nurture, take care of
Synonyms: aid, ameliorate, better, cherish, devote oneself to, educate , encourage, forward, foster, further, help, improve, instruct, nurse, patronize, promote, pursue, raise, rear, refine, support, teach, train

[emphasis mine]

Just look at that list of words. Is there any better way to describe what education, and in our particular case, a home education, is really all about? I really could have bolded every single synonym, but I chose the onese I especially connected with when I thought about what I hope our family time looks like during these homeschooling years. I want to cherish this extra time with my children and devote myself to educating and encouraging them as we raise them to young adulthood. It’s our job to nurture and support them, teach and train and refine them as they learn ABCs and biology and how to make good decisions.

We are total newbies when it comes to homeschooling. We only just decided a couple months ago that we’d definitely be heading down that path. I haven’t been reading blogs about homeschooling or researching curriculum (until recently, heh) or determining my teaching style and the kids’ learning styles. I’m pretty sure there’s going to be a good bit of trial and error. But what it all comes down to for us, really, is our committment to cultivate in our children a love of learning, a loving relationship with us and a love of Christ as the leader of their lives.

{endquote}
“I want to cultivate the seed that was placed in me until the last small twig has grown.” –Kathe Kollwitz